Faces of the Forge

Written by Lorinda Peel-Wickstrom

Tim Peel-Wickstrom

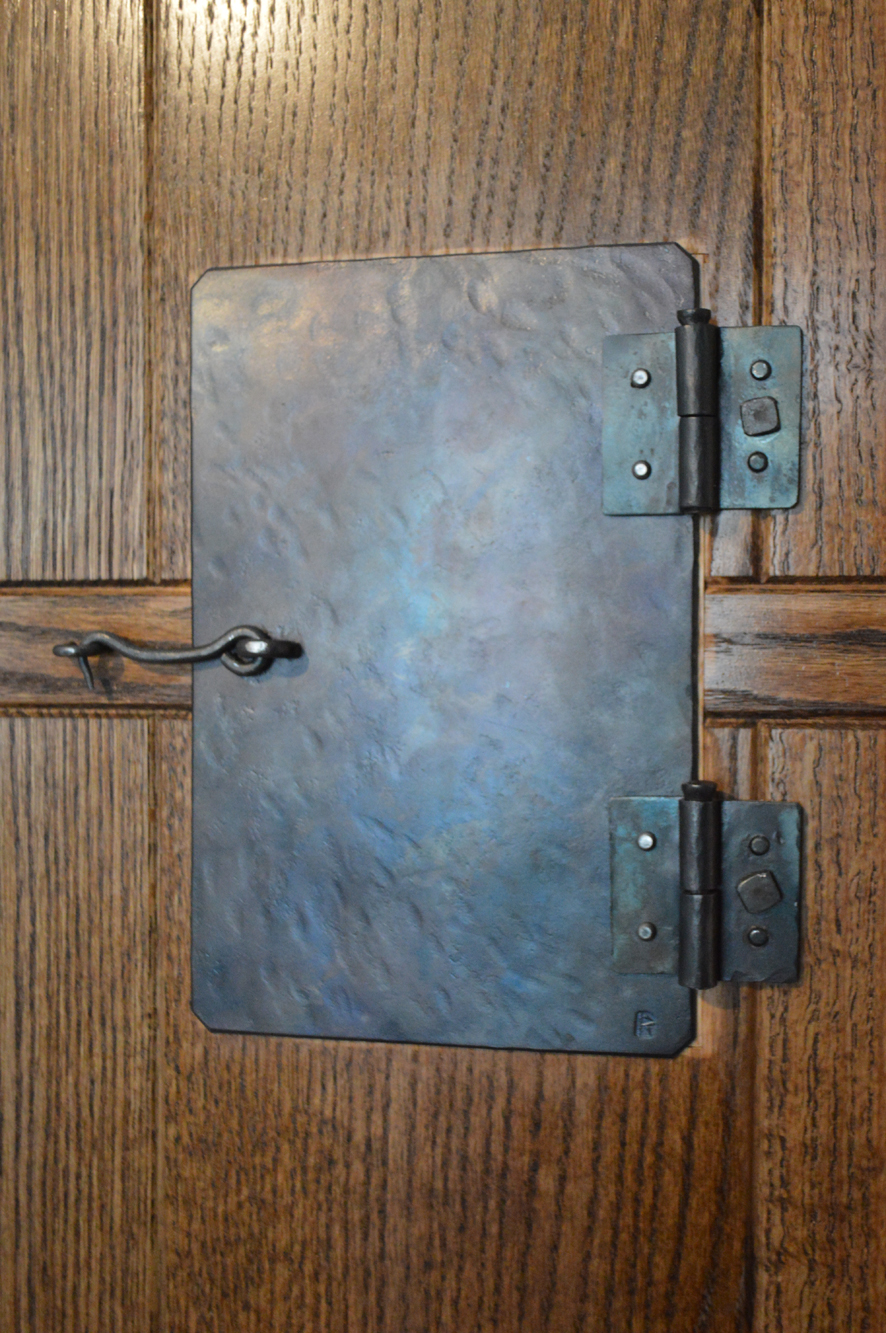
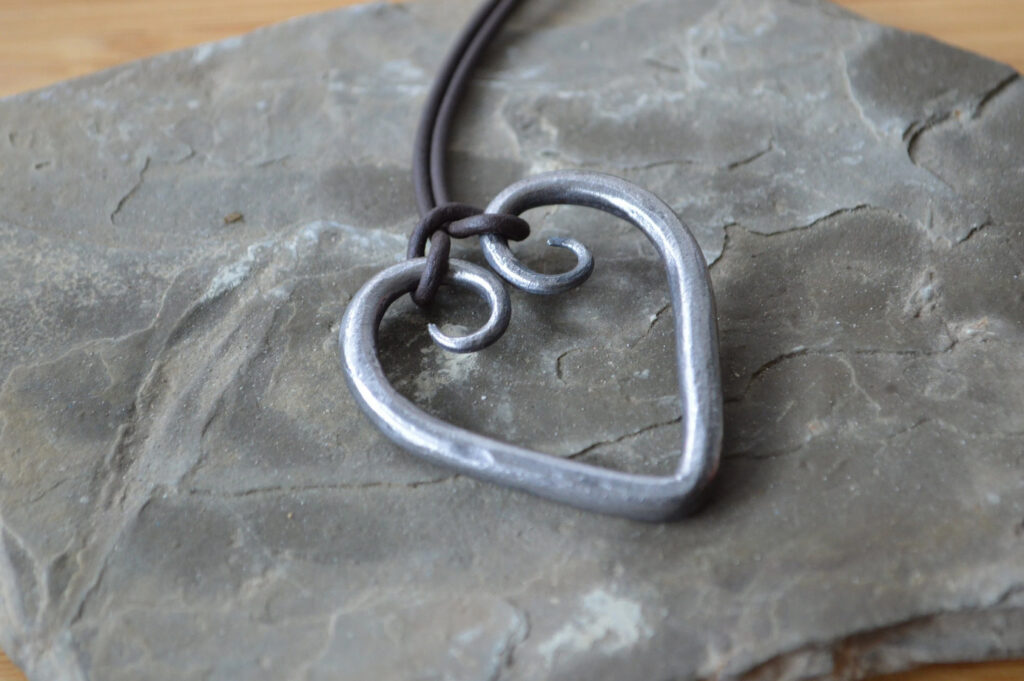
In 2013, an idea came to Tim of creating a blacksmithing business that utilized scrap metal re-purposed into new products. He wanted to align a sustainable business concept that redirected material away from landfills, with his desire to make historical and functional items. What began as a hobby of making chainmail armor and learning about medieval armor smithing grew into a means of producing practical tools in an artistic and old-fashioned way.

After immersing himself in the realm of gardening and permaculture, Tim realized the importance of high quality gardening tools. He wanted to re-purpose material and create items of beauty that would last for a life-time, to honor the way tools were created in the past and to avoid contributing to our disposable consumerist tendencies.  

In 2012, he participated in his first blacksmithing course, which was a three day event. Prior to that he had found a local blacksmith who traded beer for training and the use of his shop. This was truly the circumstance that ignited Tim’s interest in smithing and led to him further his education on it by taking occasional courses or workshops. Next came setting up a dedicated shop space to practice in. The initial shop area was a small shed really intended for storage and a lawnmower or two. Though challenging in its size, Tim learned he could work with a very simple environment if need be. Around 2017, he officially launched Reforged Ironworks. His shop space has grown over time to accommodate more tools, products being produced, and people becoming involved. (Now his shop could fit at least ten lawnmowers! And a power hammer.)

In 2019 our family relocated to the Creston area, and Tim joined The Kootenay Blacksmith Association. When our family attended the gatherings and workshops held by this group, we were part of the minority of younger people. This association showcased informative experience and talent to encourage other smiths to continue with the craft; there does seem to be a resurgence of interest in learning older trades. It can also be isolating practicing work that isn’t very common, so it was inspiring to have a gathering and encourage connection between experienced and aspiring smiths, hobbyists and those making a career of the practice and those who just wanted to see what the trade looked like in action.

Tim has set up several forges, one being a traditional Japanese charcoal forge. He learned to make his own charcoal and appreciates the simplistic, soothing, and quiet function of a fuigo Japanese bellows with charcoal fuel. It fits in well with our desire to engage in slow-craft where we are working in a different direction than mass production.

Tim enjoys sharing his experience and knowledge with others and has created a Youtube channel with instructional and educational videos. He also teaches classes on occasion. He is always learning new techniques or experimenting with making more tools, and continues to nourish the seed which grew into Reforged Ironworks as seen today. It hasn’t been an easy journey trying to make ends meet as an artisan family practicing slow-craft, yet in 2026 our family celebrated a decade of running a blacksmithing business.

When he’s not nerding out watching smithing videos, he alternatively nerds out as a dungeon master playing D&D (and has shared the joy of this game with his step-daughter, Hazel). Learning to play guitar, perfecting the skills of sourdough bread baking and Sudoku are some of his other interests.


Trustin Blackmore

Trustin joined our team in February 2025. He had sneak peeks into our shop when he began dating our daughter, Hazel, several years prior; his interest in the craft was subsequently piqued. Beforehand he’d also tried blacksmithing during a school field trip to the preserved historical attraction Fort Steele Heritage Town.

At a young age, Trustin was drawn to making things with his hands – anything from treehouses to fishing baskets, but also especially metal wire.  What began as a child twisting wires together to see what he could create evolved into teaching himself to create jewellery and art pieces with fine wiring later in his youth. Growing up in an industrious family, Trustin was encouraged to follow his interests wherever they led. His artistic talents and creative pursuits pulled him to find work where he was able to create and work with his hands.  He also began experimenting with smelting copper and creating molds; the idea of blending function and art and the malleability of metal appealed to him. Smithing was a natural fit with his skills and interests, and when he was required to learn about a skill or trade in school for a graduation project, he approached Tim as a teacher to learn how to make a knife. He took to the work easily and was keen to continue his education on blacksmithing techniques; with Tim’s encouragement, Trustin stepped into the shop to learn the trade and work as a part of our team.

Aside from becoming a talented blacksmith, Trustin is also an aspiring electrician and an active bushcrafter, hunter and remote camping enthusiast. If he’s not working in the shop, constructing projects at his home base (one current project is building himself a tiny home), or frying bannock on his woodstove, you can often find him putting together rugged shelters and learning self-sufficiency in the wild. He has also recently learned the skill of cooking rice over a fire. With his experiences of off-grid living, he’s further developed respect for traditional methods and age-old skills, as well as a desire to learn new ideas and techniques.

We welcomed his enthusiasm for hand-crafted materials, his perseverance with repetitive work and his willingness to learn as beneficial contributions to Reforged Ironworks. 


Hazel Raine

Hazel was introduced to blacksmithing as a child when she witnessed Tim’s work in the shop. Many of her childhood memories are soundtracked with the distant comforting drumbeat of Tim’s hammer from his first tiny shop. Being an artistic and creative individual who also appreciated works of art, she was willing to help out in the shop or behind the scenes with packaging beginning in 2023. As business grew with the influx of interest in online shopping and platforms like Etsy, the need for extra hands became apparent and Hazel stepped in more regularly. We liked the idea of growing a family business where each member could contribute and earn from it.

Hazel had participated in artisan and farmer’s markets with us since childhood, where she began to sell her poetry, artwork and eventually photography. Part of her education from us as parents has been about finding meaningful work, creating products/art, marketing them and running a business. Hazel brought valuable photography skills and website/videography assistance to our team. She takes photos and videos of our products and helps to make videos of their creation process; the photos in this blog are hers. Her contributions include using the equipment in the shop to help with the polishing, finishing and leather-wrapping of the tools, writing posts for our website and newsletters (with a mean eye for grammar), and packaging products for shipping. Her work has primarily been behind-the-scenes, but her help and her willingness to learn have been invaluable assets to Reforged Ironworks.

In 2021 Hazel created a blog which she updates a couple of times a month and has maintained for five years. The blog grew into her own website, Instinct & Intuition, as well as a Substack account. These platforms showcase her beautiful photography and artwork and have also been a means of growing her talent for writing. Her inspiration from the natural world is featured predominantly in her work. Her interests as a young adult have grown to include collecting dead bugs and other creatures (okay, this one goes back to childhood), foraging for mushrooms, camping, canoeing, bushcraft/survival skills, and participating in the Columbia Basin Regional Advisory Committee. Being a homeschooled youth gave Hazel the flexibility to put more focus on her own interests and talents, and her dedication to honing her skills and being an engaged learner is apparent.


Lorinda Peel-Wickstrom

Lorinda has always been drawn to art, as far back as she can remember, and it runs further back in her ancestry too. She’s also very intrigued by the plant world, especially the realm of herbal medicine. She’d really like for her plant spirit ally to be stinging nettle but has yet to get to that level of plant communion.

Back in 2013, Lorinda signed up for a permaculture course which expanded her understanding of interconnectedness, and had her considering becoming an urban farmer. She also met Tim, and they began a long-distance relationship despite her hesitation around that. She loved his idea of creating a blacksmithing business that re-purposed steel to make artistic and functional tools, and has supported that concept ever since. The urban farming never quite got off the ground, but Tim and Lorinda eventually expanded their own little farm.

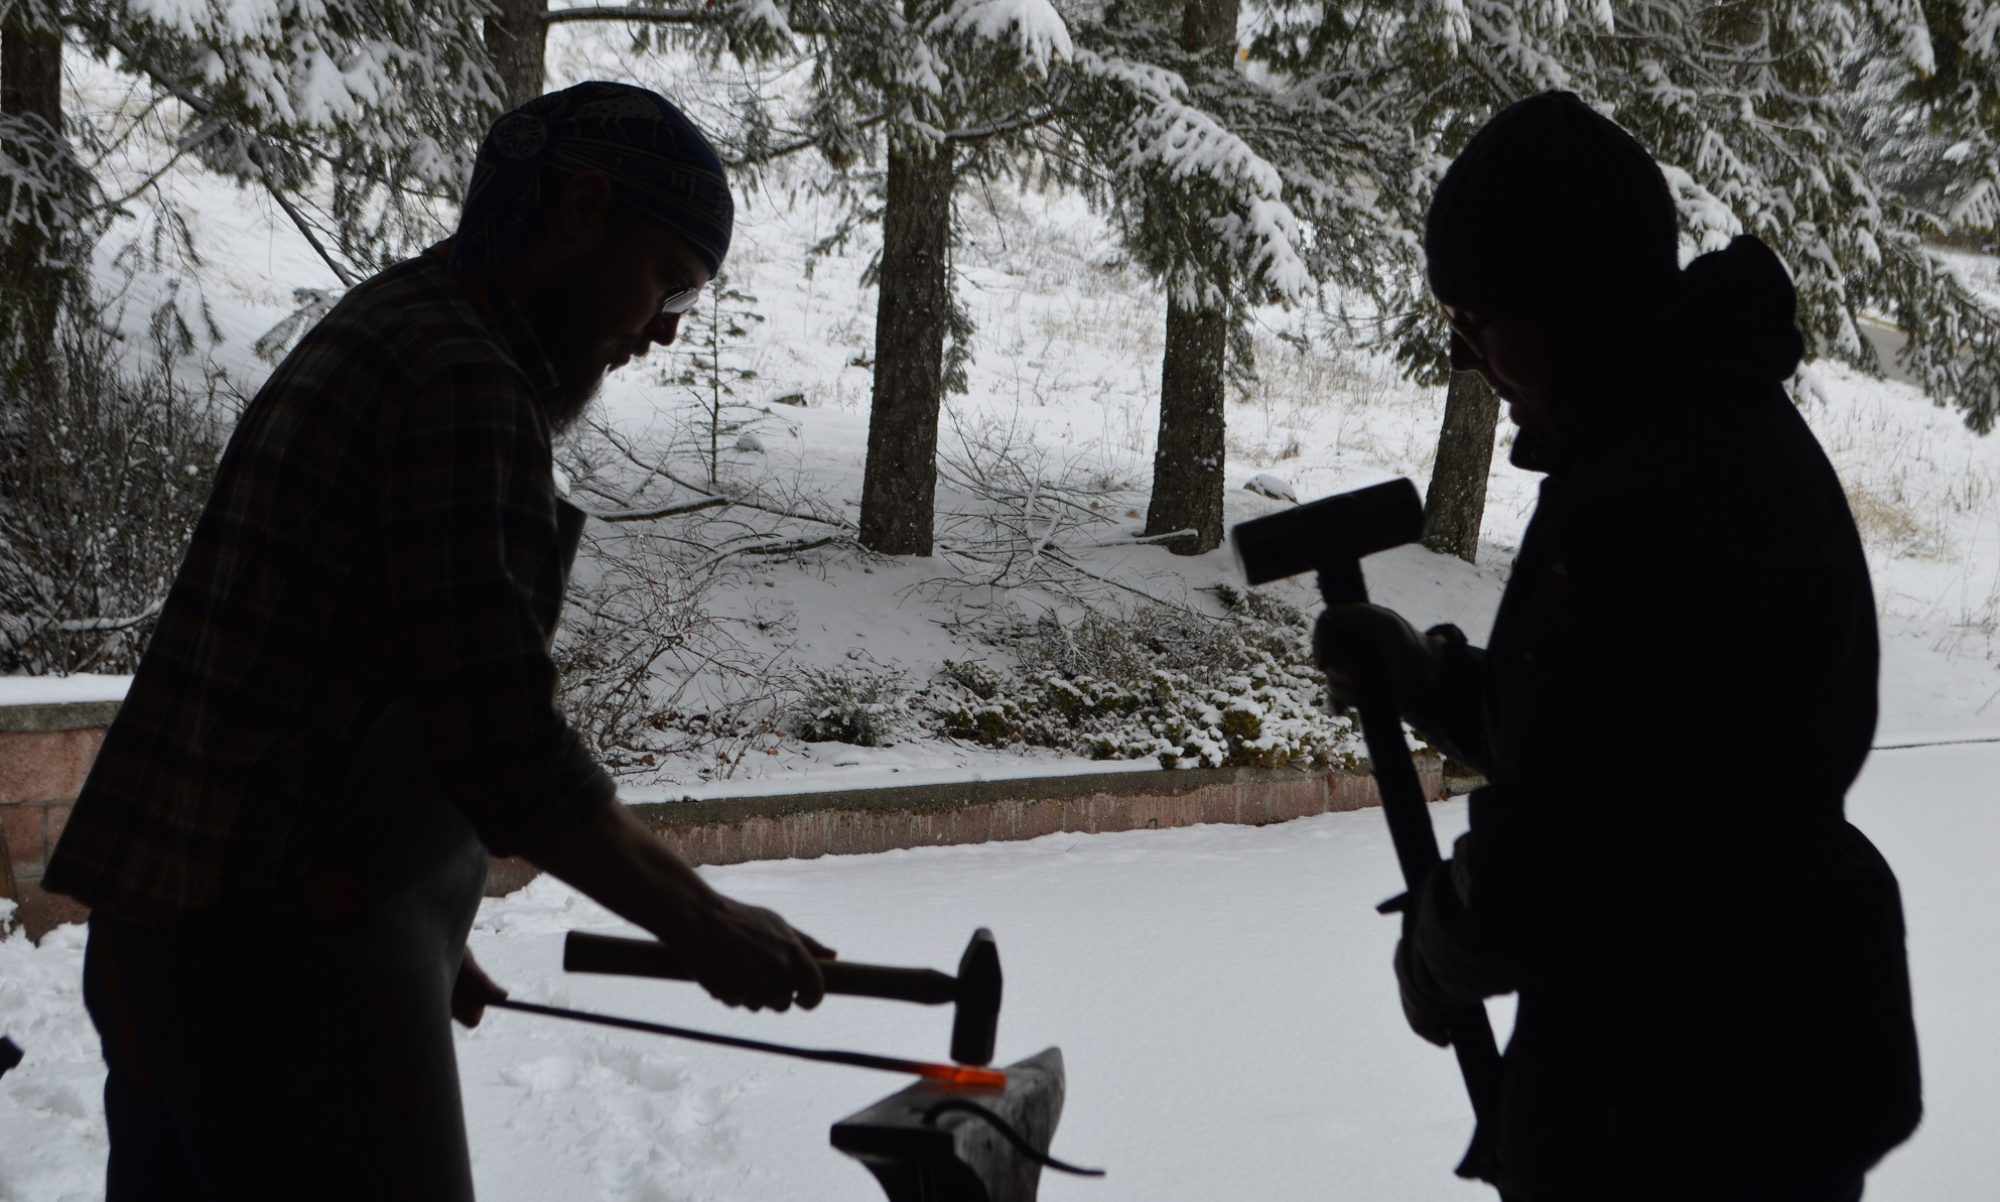
Fast forward to 2020, the husband and wife duo took a business course in the town they had newly relocated to, and were each about to launch their respective businesses in the community, when the world went into lockdown. Lorinda’s plan to expand on the sale of her herbs and art was shut down due to retail closures. Reforged Ironworks took off with its online sales, and Lorinda stepped into the forge for the first time to learn how to smith and help Tim keep up with sales. It was a rusty start, but eventually with Tim’s patient guidance, persistence and practice, her forging improved, and she worked as an apprentice smith. Her favorite job is to use the sledge hammer in tandem with Tim while forging. She also began helping Tim combine iron with foraged driftwood pieces from a nearby lake to create artistic home-decor.

Her additional interests include working with her draft horse, mainly learning how to use a horse for logging several years ago, and riding. Her main joys in their homesteading lifestyle are tending to their fur and feather creatures, foraging for food and medicine, gardening, browsing cookbooks and making nutritious meals with the family. She also continues to practice drawing, painting and creative projects. In (what feels like) another lifetime, she was an event and music promoter, and now tends towards a quieter, more hermit-style life; but appreciation for how music, writing and the arts bring beauty to our world runs deep in her veins.


Our family also continues to search for their future homestead, hopefully in the Kootenay region, but they have begun to look elsewhere. If you are interested in selling an acreage to people who would work to be stewards of the land, please get in touch with us to see if it could be a potential fit.

Ornamental Ironwork Project – Custom Door Hardware

Daiku Woodworks, based in Creston, British Columbia, reached out to me in late December to see if I would forge some door hardware for their custom, handmade oaken front door. Needless to say, the answer was an enthusiastic yes!

The pieces need were a door knocker, decorative strap hinges, window decoration and iron studs. Later, the client asked for a metal panel over the window interior that could be opened. All pieces were finished with linseed oil and beeswax mix.

Door knocker detail featuring a fleur-de-lys and forge welded collar on the knocker.
Window decoration forged from 1/2″ square bar featuring simple joinery.
Decorative hinge (door opens from the inside) also using the fleur-de-lys motif. Note the iron studs set into the oaken door panel.
Metal panel covering the window from the inside. Hand forged hinges, all featuring traditional joinery.
The finished project. Perhaps next time we’ll put it in a forged door handle as well.

For those interested in the details of the ironwork, here are closeups of each piece.

Door Knocker

Starting with a piece of 1/4″ x 2″ scrap steel bar, the flower was hot chiseled and shaped. The bottom flares were also hot chiseled and forged to shape.

The knocker is a 1/2″ square bar with a 3/8″ x 1″ collar forge welded onto the center. The ends gently taper and are twisted, then bent round to form the circle shape. A small gap was left between the two ends, and a small piece welded in behind the clasp to prevent the knocker from spinning.

Detail of the clasp, riveted into place.

Decorative Hinges

Because the door opens inward, I was asked to provide hinges that were decorative in nature. They are still quite sturdy, forged from the same scrap of 1/4″ x 2″ bar that was used for the door knocker. The same flower motif is applied at the end of each hinge, with a set of leaves at the base. I was grateful for my Little Giant hammer when drawing these bars out.

Window Decoration

This was the part I was most uncertain about with the joinery involved, but with a few trials and patience I was able to create this cage to the dimensions required. It was all forged from 1/2″ square bar.

The “legs” that attach to the door were punched and drifted to accept the twisted cross bars. There was a challenge there as the twists were out by a few degrees and required adjustment after the piece was assembled.

Window Panel

This was an additional request from the client after he had seen the exterior. It was kept simple in design intentionally. Two hinges and a simple latch hold the panel in place. The panel was made from a piece of 1/16″ sheet steel (new, unfortunately) but I gave it some texture and ended up with a really interesting oxidized finish by heating in the forge.

The U-shaped anchor holding the latch is attached to the plate by creating two tiny tenons on the ends of the “U” and riveting it into place.

Revisiting Old Work – The Iron Heart

The first design of the iron heart I forged was created way back in 2017 when I first started as a full time blacksmith. Here’s a photo of it as used in our online shop:

I received an order for one just a few days ago and I decided to revisit the design as I felt the old one was a little “flat” and could use some character.

There are three main differences between the two designs.

First, the new design has a full length taper starting from the bottom point of the heart that extends all the way to the curl at the top. This creates more texture in the steel and a more appealing look where the bottom appears heavier and sturdier.

Second, the V-shape of the heart has a curve in that bends outwards before curling in. This gives the piece a better sense of liveliness.

Thirdly, the bottom point is more pronounced which adds to the sense of flow to the iron heart.

For myself, revisiting these older designs and coming at them with the eight years of experience I have with moving metal helps me improve as a ‘smith, and also breathes life into my older work.

We have these for sale now in our shop.

Address Sign Project

This was a custom order we received from some folks in the US. They had a rough design in mind, and it was up to us to decide on the execution of it. It’s an interesting process where sketch means reality, working within the constraints of the material and the functional requirements of the project (in this case, it was a sign that could be hung up securely, was black in colour and would be resistant to the outdoor elements).

The final dimensions were roughly 36″ across and 24″ tall by 1″ deep. The finish is a matte black Rustoleum spray paint. The frame was constructed with hot rolled mild steel and assembled via welding.

The completed piece with a matte black finish.
The blueprint of the sign, to scale.

The design was originally created at a much smaller scale to ensure our customer was satisfied with it. Once that was finalized, we printed it at a 1:1 scale on multiple pieces of 8.5″ x 11″ printer paper, and the whole design transferred to a piece of scrap plywood.

The forged cross.

Starting to create the forged pieces and using the transferred design as a reference. This was a technique I learned in an ABANA course on making a grille. The cross was forged from 1/2″ square bar, upset at the ends.

Adding the scrolls on either side.

More pieces are added. The printer paper was covered in blue chalk on the back and I used a ball point point to trace the lines, thus transferring the design onto the plywood. I didn’t have a piece of rusty sheet metal large enough for the project. Metal is preferable because I’d be able to place a hot piece of steel against the design to see if it needed tweaking. In this case, I had to cool the part enough so that it wouldn’t scorch the wood.

The sign assembled together with scrolls and backing.

All the pieces are collected here, but not assembled. The penny scrolls on the sides of the frame were replace with a tapered scroll in the end.

Detail of the cross.

The “crown of thorns” detail was a tricky bit of work. I wasn’t sure exactly how I was going to tackle transforming that bit of design into reality, until one night I suddenly thought of barbed wire. The wire was just the right scale for the project, so I took a length of it and wrapped it up around itself.

A detail view of the edge and plate backing..
From another angle.
Detailing of scrolls.

Here we can see as the project came along that the side scroll finials changed from penny to tapered. The customer preferred the look of these finials, and it was a quick enough job to change them. The top and side scrolls met at the corner and were welded together.

Detail of the finished cross.
Detail of leaf scroll.
Detail of completed scrolls.
The completed piece with a matte black finish.

Ornamental ironwork is a very creative process and I enjoy the occasional project.

If you have an idea that you would like to see come to life, send us an email at info@reforgedironworks.com

Railing Project

A local client contacted me about forging a railing for their front step. It went through a couple iterations before the client was happy with the design I drew up for them. Functionality is always a top concern, and the client was happy to let me handle the details of the ironwork and finishing.

The railing just after installation.

The installed railing was secured with anchor bolts into the wall on the top step, and concrete anchor bolts at the bottom. The rail itself is a solid 1/2″ x 1 1/2″ steel bar.

Side view of the piece.
Detail of leaf scroll.

The leaf finial scroll at the front and end of the rail were forged separately from 1/4″ x 1″ bar, and then riveted into place. I was working within the limitations of my workshop, and being unable to forge a 6′ length of heavy bar, while keeping modern welding to a minimum, meant using the traditional riveting technique.

Detail of bottom scroll.

Each scroll is a snub nosed finial forged from 1/4″ x 1″ flat bar. The pieces were forged such that each scroll appears to flow out of the proceeding one, creating a sense of movement down the rail.

Detail of end leaf scroll.

The wall mount was forged from plate and given a leaf-type texture to tie in the motif. The second leaf finial scroll can be see here with the rivet details below. The wall mount was welded to the rail.

Top view where the connection between the pieces is visible.
A complete view of the railing.
Here all the leaf scrolls and spirals are shown.

The post is simply a 1″ square tube. Budget constrains required that I use modern welding in many places. Traditionally the post would be solid steel and connected to the rail and base plate with mortise and tenon joinery.

Left side view of the railing.

This photo really capture the flowing effect of the progressively enlarging scrolls “tumbling” down the under side of the rail.

Left detail of bottom scroll.
Detail of middle scroll.
Side view of scroll.

The finish was something I agonized about during the entire project. I detest paint finishes for a number of reasons, the most important being that it obscures the naturally beautiful finish that comes with forged ironwork. I consulted with another blacksmith with more experience in outdoor ornamental pieces and I settled on a mix of linseed oil, beeswax and turpentine tinted with stove black, a polish for wood stoves.

Before connecting all the pieces and after polishing all the surfaces with a wire wheel brush, I heated them to a black heat in the forge. This creates a uniform dark gray colour on the steel and helps to protect it from rust. The dark gray comes from a thin layer of scale that forms from heating.

Once the piece was assembled, I applied the linseed oil finish to the rail. Now, one of the benefits of a linseed oil finish is that it can be reapplied easily to the piece. If rust does happen to form in a spot, it can be scoured away and linseed oil applied. No need to repaint the entire rail in the future.

Elk Antler Hunting Knife

Elk Antler Hunting Knife

A 9″ hand forged blade mounted in an elk handle with iron guard and pommel.

Leather sheath created by Dave Lougheed.

This was a commission piece for a fellow Creston valley resident. She wanted a hunting style knife with an antler handle for her husband, engraved with the words “Irish” and “Wrath” as a testament to his heritage. Otherwise the design details were left up to me.

The knife design was based on a outdoor survival book I picked up a few years ago called “Bushcraft – Outdoor Skills and Wilderness Survival” by Mors Kochanski. Accordingly, I asked the client and her husband to stop by so I could measure his palm width, and both the handle and blade length were created to suit (being 4 1/2″ long for each).

Kochanski advises that the spine of the blade be flat or slightly dropped at the tip, and I decided to use a tanto kata that was generously given to me by Dave J Friesen of Crossed Heart Forge to help me shape the profile of the blade. Since the handle was made from an elk antler (also from Dave), I decided on a rat tail tang with a flat iron pommel so that I could rivet the knife together.

The knife was forged from an old carriage spring dating back to the 1800s, using a charcoal forge and Japanese fuigo bellows. I have finally started making my own charcoal so I’m proud to say that this knife was forged using fuel I made earlier in the year.

I chose to use yaki-ire to temper the blade, and the hamon can be seen from the hardening process. This is more thoroughly explained on the Elk Knife Process page.

Scrap 1/8″ plate steel with a hammered pebble texture form the guard and pommel. They were left just slightly oversized to the elk handle, and handle itself has had nothing done to it.

A Farrier’s Belt Buckle

The farrier who stops by our little homestead every now and then to tend to our Norwegian Fjord was kind enough to supply us with rasps that are too worn done for the work she does. In trade, we forged this belt buckle for her from one of the rasps she gave us.

I used a angle grinder to cut the rasp in half and forged it oval-like, and put in grooves as one would see on an actual horseshoe. This was all made to the farrier’s criteria but she left the creative details up to me.

horseshoe rasp belt buckle
belt buckle back detail

Rasps are made of a steel that has a higher amount of carbon in it. That can make welding a tricky thing. Luckily I know an experienced welder who managed that part of it. Just to be extra careful, I tempered the buckle after welding to remove any stresses that might have been in the welds. Best to have relaxed steel if it’s allowed.

wearing a belt buckle made from a farrier rasp

Turning scrap into functional art is what we love to do best.

A Viking Styled Dagger

Viking dagger and leather sheath

This was a custom order from Ragnar the Trader, a long time customer and friend of the forge. It’s made from reclaimed spring steel, hand polished with diamond stones and it makes its home in a hand sewn leather sheath embossed with a Viking dragon.

The dagger is forged from a single piece of spring steel. The blade was hardened using the traditional yaki-ire process, where a clay slip is applied to the blade so that hardening is localized to the edges. After tempering, the edge is approximately rated to hardness of 55-60 HRC using a set of Japanese hardness testing files.

The handle is shaped for comfort and a sure grip. The handle wrap is tanned leather lace.

The sheath is made from vegetable tanned leather, 8 oz weight, hand dyed and embossed with a Viking dragon motif.

A simple belt loop keeps the dagger and sheath in place.

We do custom work all the time. Go to our contact page and tell us about your idea.